CRUD Operation Using Stored Procedure In ASP.NET GridView
Introduction
A GridView is a graphical control element that presents a tabular view of data. A typical Grid View also supports some or all of the following:
Clicking a column header to change the sort order of the Grid.
Dragging column headers to change their size and their order.
The GridView control displays the values of a data source in a table. Each column represents a field, while each row represents a record.
- Support to data source controls, such as SqlDataSource.
- Support sort capabilities.
- Support update and delete capabilities.
- Support paging capabilities.
- Support row selection capabilities.
- Code-behind feature access to the GridView object model to dynamically set properties, handle events, and so on.
- Many key fields.
- Many data fields for the hyperlink columns.
- Customized style layout through themes and styles using CSS and javascript.
The following operations can be performed using GridView control in ASP.NET using C# code behind.
- Feature to Bind data to GridView column
- Feature to Edit data in GridView
- Feature to Delete rows from GridView
- Feature to Update row from the database
Note
The most important feature that we can get by using GridView events are — RowEditing, RowUpdating, RowDeleting, RowCommand, RowDataBound, RowCancelingEdit, and Pagination.
Fields
BoundColumn To control the order and rendering of columns.
HyperLinkColumn Presents the bound data in HyperLink controls
ButtonColumn Bubbles a user command from within a row to the grid event handler
TemplateColumn Controls which controls are rendered in the column
CommandField Displays Edit, Update, and Cancel links in response to changes in the
GridView control’s EditItemIndex property.
Details Of Fields
By explicitly creating a BoundColumn in the Grid’s Columns collection, the order and rendering of each column can be controlled. In the BoundField properties, when the DataField and the SortExpressions are given, sorting and rendering the data can be easily done.
A HyperLinkColumn presents the bound data in HyperLink controls. This is typically used to navigate from an item in the grid to a Details view on another page by directly assigning the page URL in NavigationUrl or by rendering it from the database.
With a TemplateColumn, the controls which are rendered in the column and the data fields bound to the controls can be controlled. By using the TemplateColumn, any type of data control can be inserted.
The EditCommandColumn is a special column type that supports in-place editing of the data in one row in the grid. EditCommandColumn interacts with another property of the grid: EditItemIndex. By default, the value of EditItemIndex is -1, meaning none of the rows (items) in the grid are being edited. If EditItemIndex is -1, an “edit” button is displayed in the EditCommandColumn for each of the rows in the grid.
When the “edit” button is clicked, the grid’s EditCommand event is thrown. It’s up to the programmer to handle this event in the code. The typical logic sets EditItemIndex to the selected row, and then rebinds the data to the grid.
When EditItemIndex is set to a particular row, the EditCommandColumn displays “update” and “cancel” buttons for that row (“edit” is still displayed for the other rows). These buttons cause the UpdateCommand and CancelCommand events to be thrown, respectively.
Types of Events
PageIndexChanging event occurs when the property of the grid AllowPaging is set to true, and in the code behind the PageIndexChanging event is fired.
Paging in GridView is enabled by setting AllowPaging to true.
Paging in The GridView provides the means to display a group of records from the data source (for example, the first 20), and then navigates to the “page” containing the next 20 records, and so on through the data.
When enabled, the grid will display page navigation buttons either as “next/previous” buttons or as numeric buttons. When a page navigation button is clicked, the PageIndexChanged event is thrown. It’s up to the programmer to handle this event in the code.
The GridView fires the RowCommand event when any button is pressed. We can give any name as a command name, and based on that, the check will be done and the loop will be executed.
The GridView fires the RowCreate event when a new row is created.
The GridView fires the RowDeleting event when the command name is given as Delete.
The GridView fires the RowUpdating event when the command name is given as Update.
The GridView fires the RowEditing event when the command name is given as Edit.
The GridView fires the RowDatabound event when a data row is bound to data in a GridView control.
Data in a Grid is commonly sorted by clicking the header of the column to sort. Sorting in a DataGrid can be enabled by setting AllowSorting to true. When enabled, the grid renders LinkButton controls in the header for each column. When the button is clicked, the grid’s SortCommand event is thrown. It’s up to the programmer to handle this event in the code. Because DataGrid always displays the data in the same order it occurs in the data source, the typical logic sorts the data source and then rebinds the data to the grid.
Steps to be followed
Step1
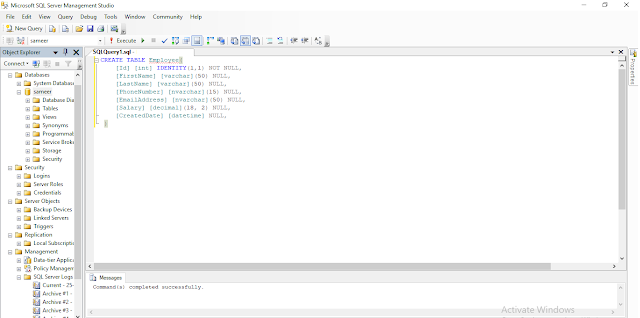
First, create a table named “Employee”.
Code Ref
- CREATE TABLE [dbo].[Employee](
- [Id] [int] IDENTITY(1,1) NOT NULL,
- [FirstName] [varchar](50) NULL,
- [LastName] [varchar](50) NULL,
- [PhoneNumber] [nvarchar](15) NULL,
- [EmailAddress] [nvarchar](50) NULL,
- [Salary] [decimal](18, 2) NULL,
- [CreatedDate] [datetime] NULL,
- )
Step2
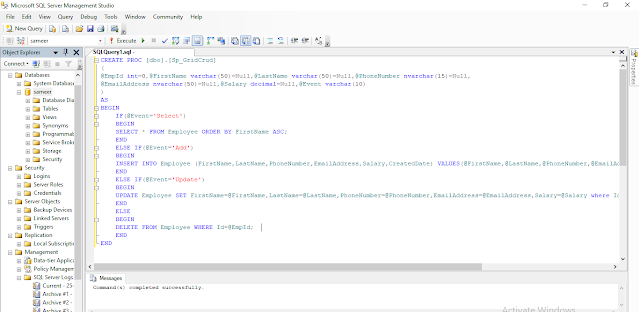
Then, create a stored procedure named “Sp_GridCrud”. Here, we are using one stored procedure for multiple operations, like insert, update, delete, and select.
Code Ref
- CREATE PROC [dbo].[Sp_GridCrud]
- (
- @EmpId int=0,@FirstName varchar(50)=Null,@LastName varchar(50)=Null,@PhoneNumber nvarchar(15)=Null,
- @EmailAddress nvarchar(50)=Null,@Salary decimal=Null,@Event varchar(10)
- )
- AS
- BEGIN
- IF(@Event=’Select’)
- BEGIN
- SELECT * FROM Employee ORDER BY FirstName ASC;
- END
- ELSE IF(@Event=’Add’)
- BEGIN
- INSERT INTO Employee (FirstName,LastName,PhoneNumber,EmailAddress,Salary,CreatedDate) VALUES(@FirstName,@LastName,@PhoneNumber,@EmailAddress,@Salary,GETDATE());
- END
- ELSE IF(@Event=’Update’)
- BEGIN
- UPDATE Employee SET FirstName=@FirstName,LastName=@LastName,PhoneNumber=@PhoneNumber,EmailAddress=@EmailAddress,Salary=@Salary where Id=@EmpId;
- END
- ELSE
- BEGIN
- DELETE FROM Employee WHERE Id=@EmpId;
- END
- END
Step3
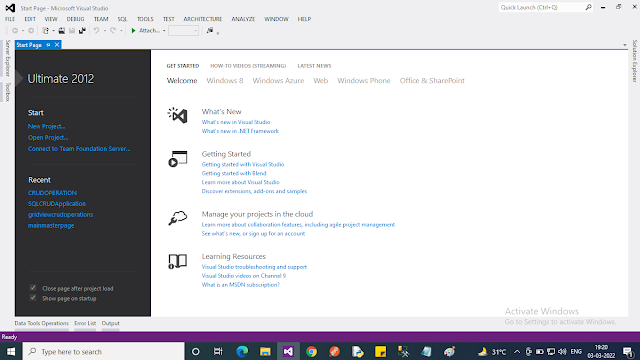
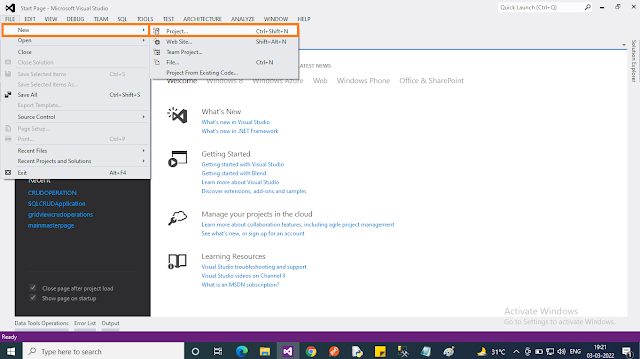
Create an ASP.NET Web Application named “GridViewDemo”.
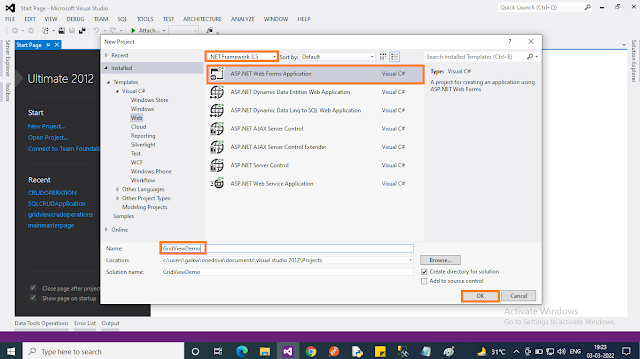
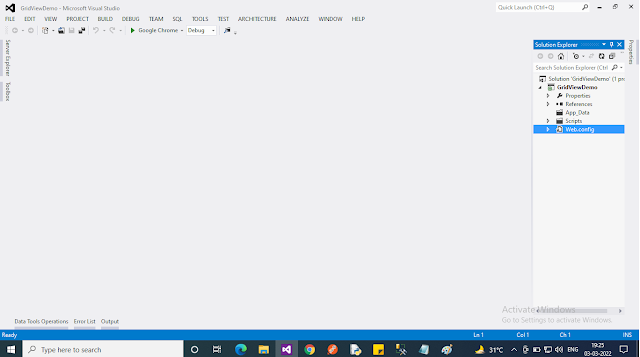
Step4
Add some CSS and JavaScript-related files in the below-mentioned folders for form validation purposes in ASP.NET.
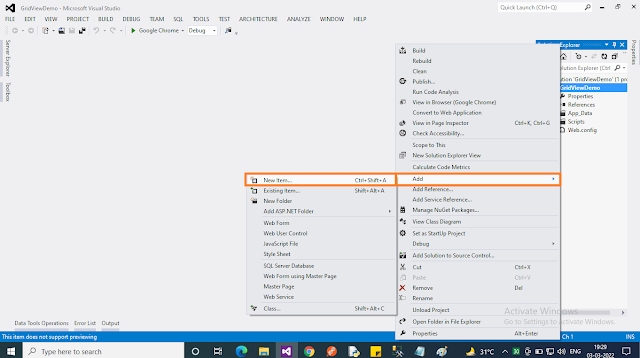
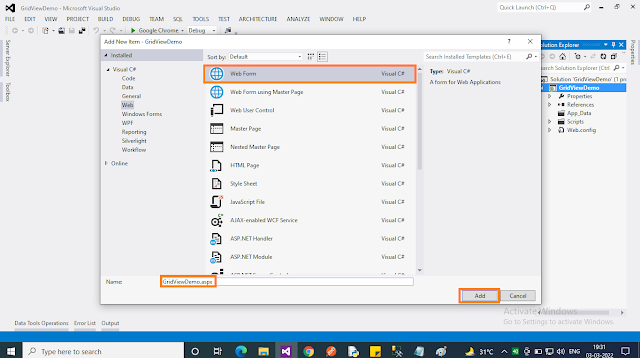
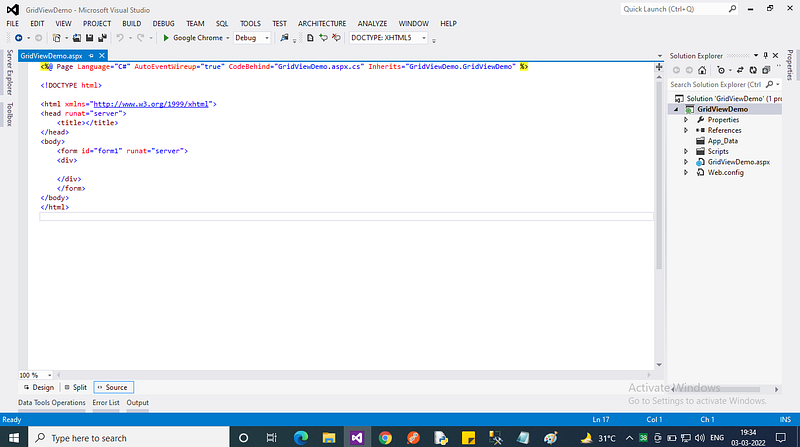
Step5
Add a Web Form named “GridViewDemo.aspx”.
Code Ref. Of GridViewDemo.aspx
- <%@ Page Language=”C#” AutoEventWireup=”true” CodeBehind=”GridViewDemo.aspx.cs” Inherits=”GridViewDemo.GridViewDemo” %>
- <!DOCTYPE html>
- <html xmlns=”http://www.w3.org/1999/xhtml">
- <head runat=”server”>
- <title>Satyaprakash Samantaray</title>
- <% — Botstrap Part — %>
- <style>
- .button {
- background-color: #4CAF50;
- border: none;
- color: white;
- padding: 15px 32px;
- text-align: center;
- text-decoration: none;
- display: inline-block;
- font-size: 16px;
- margin: 4px 2px;
- cursor: pointer;
- }
- .DataGridFixedHeader {
- color: White;
- font-size: 13px;
- font-family: Verdana;
- background-color:yellow
- }
- .grid_item {
- background-color: #E3EAEB;
- border-width: 1px;
- font-family: Verdana;
- border-style: solid;
- font-size: 12pt;
- color: black;
- border: 1px solid black;
- }
- .grid_alternate {
- border-width: 1px;
- font-family: Verdana;
- border-style: solid;
- font-size: 12pt;
- color: black;
- background-color: White;
- }
- .button4 {
- border-radius: 9px;
- }
- input[type=text], select {
- width: 40%;
- padding: 12px 20px;
- margin: 10px 0;
- display: inline-block;
- border: 1px solid #ccc;
- border-radius: 4px;
- box-sizing: border-box;
- font-family: ‘Montserrat’, sans-serif;
- text-indent: 10px;
- color: blue;
- text-shadow: 0 1px 2px rgba(0, 0, 0, 0.3);
- font-size: 20px;
- }
- </style>
- <% — Botstrap Part — %>
- <% — Validation Part — %>
- <link href=”css/template.css” rel=”stylesheet” type=”text/css” />
- <link href=”css/validationEngine.jquery.css” rel=”stylesheet” type=”text/css” />
- <script src=”js/jquery-1.6.min.js” type=”text/javascript”></script>
- <script src=”js/jquery.validationEngine-en.js” type=”text/javascript” charset=”utf-8"></script>
- <script src=”js/jquery.validationEngine.js” type=”text/javascript” charset=”utf-8"></script>
- <script type=”text/javascript”>
- jQuery(document).ready(function () {
- jQuery(“#form1”).validationEngine();
- });
- </script>
- <% — Validation Part — %>
- <% — <link rel=”stylesheet” type=”text/css” href="https://maxcdn.bootstrapcdn.com/bootstrap/3.3.7/css/bootstrap.min.css">--%>
- </head>
- <body>
- <form id=”form1" runat=”server”>
- <fieldset>
- <legend style=”font-family: Arial Black;background-color:yellow; color:red; font-size:larger;font-style: oblique”>Satyaprakash’s Real-Time Project</legend>
- <table align=”center”>
- <tr>
- <td colspan=”3" align=”center” class=”auto-style1">
- <strong style=”background-color: Yellow;color: Blue; text-align: center; font-style: oblique”>Satyaprakash’s Real-Time GridView CRUD Using Stored Procedure In Asp.Net</strong>
- </td>
- </tr>
- <tr>
- <td style=”text-align:center”>
- <asp:TextBox runat=”server” ID=”txtFirstName” placeholder=”Enter First Name..” ValidationGroup=”add” CssClass=”validate[required]”></asp:TextBox>
- </td>
- </tr>
- <tr>
- <td style=”text-align:center”>
- <asp:TextBox runat=”server” ID=”txtLastName” placeholder=”Enter Last Name..” ValidationGroup=”add” CssClass=”validate[required]”></asp:TextBox>
- </td>
- </tr>
- <tr>
- <td style=”text-align:center”>
- <asp:TextBox runat=”server” placeholder=”Enter Phone Number..” ID=”txtPhoneNumber” ValidationGroup=”add” CssClass=”validate[required,custom[phone]” ></asp:TextBox>
- </td>
- <td></td>
- </tr>
- <tr>
- <td style=”text-align:center”>
- <asp:TextBox runat=”server” ID=”txtEmailAddress” placeholder=”Enter Email Address..” ValidationGroup=”add” CssClass=”validate[required,custom[email]”></asp:TextBox>
- </td>
- </tr>
- <tr>
- <td style=”text-align:center”>
- <asp:TextBox runat=”server” ID=”txtSalary” placeholder=”Enter Salary..” ValidationGroup=”add” CssClass=”validate[required,custom[number]”></asp:TextBox>
- </td>
- </tr>
- <tr>
- <td colspan=”3" align=”center”>
- <asp:Button runat=”server” ID=”btnAddEmployee” Text=”Add” OnClick=”btnAddEmployee_Click” class=”button button4" ValidationGroup=”add”/>
- <asp:Button runat=”server” ID=”btnUpdate” Text=”Update” class=”button button4" OnClick=”btnUpdate_Click”/>
- <asp:Button runat=”server” ID=”btnReset” Text=”Reset” class=”button button4" OnClick=”btnReset_Click”/>
- </td>
- </tr>
- <tr>
- <td colspan=”3" align=”center”>
- <br />
- <asp:Label runat=”server” ID=”lblMessage”></asp:Label>
- <br />
- <br />
- </td>
- </tr>
- <tr>
- <td colspan=”3">
- <asp:GridView ID=”grvEmployee” runat=”server” AllowPaging=”true” CellPadding=”2" EnableModelValidation=”True”
- ForeColor=”red” GridLines=”Both” ItemStyle-HorizontalAlign=”center” EmptyDataText=”There Is No Records In Database!” AutoGenerateColumns=”false” Width=”1100px”
- HeaderStyle-ForeColor=”blue” OnPageIndexChanging=”grvEmployee_PageIndexChanging” OnRowCancelingEdit=”grvEmployee_RowCancelingEdit” OnRowDeleting=”grvEmployee_RowDeleting” OnRowEditing=”grvEmployee_RowEditing”>
- <HeaderStyle CssClass=”DataGridFixedHeader” />
- <RowStyle CssClass=”grid_item” />
- <AlternatingRowStyle CssClass=”grid_alternate” />
- <FooterStyle CssClass=”DataGridFixedHeader” />
- <Columns>
- <asp:TemplateField HeaderText=”EmpId”>
- <HeaderStyle HorizontalAlign=”Left” />
- <ItemStyle HorizontalAlign=”Left” />
- <ItemTemplate>
- <asp:Label runat=”server” ID=”lblEmpId” Text=’<%#Eval(“id”) %>’></asp:Label>
- </ItemTemplate>
- </asp:TemplateField>
- <asp:TemplateField HeaderText=”FirstName”>
- <HeaderStyle HorizontalAlign=”Left” />
- <ItemStyle HorizontalAlign=”Left” />
- <ItemTemplate>
- <asp:Label runat=”server” ID=”lblFirstName” Text=’<%#Eval(“FirstName”) %>’></asp:Label>
- </ItemTemplate>
- </asp:TemplateField>
- <asp:TemplateField HeaderText=”LastName”>
- <HeaderStyle HorizontalAlign=”Left” />
- <ItemStyle HorizontalAlign=”Left” />
- <ItemTemplate>
- <asp:Label runat=”server” ID=”lblLastName” Text=’<%#Eval(“LastName”) %>’></asp:Label>
- </ItemTemplate>
- </asp:TemplateField>
- <asp:TemplateField HeaderText=”Phone No.”>
- <HeaderStyle HorizontalAlign=”Left” />
- <ItemStyle HorizontalAlign=”Left” />
- <ItemTemplate>
- <asp:Label runat=”server” ID=”lblPhoneNumber” Text=’<%#Eval(“PhoneNumber”) %>’></asp:Label>
- </ItemTemplate>
- </asp:TemplateField>
- <asp:TemplateField HeaderText=”Email”>
- <HeaderStyle HorizontalAlign=”Left” />
- <ItemStyle HorizontalAlign=”Left” />
- <ItemTemplate>
- <asp:Label runat=”server” ID=”lblEmailAddress” Text=’<%#Eval(“EmailAddress”) %>’></asp:Label>
- </ItemTemplate>
- </asp:TemplateField>
- <asp:TemplateField HeaderText=”Salary”>
- <HeaderStyle HorizontalAlign=”Left” />
- <ItemStyle HorizontalAlign=”Left” />
- <ItemTemplate>
- <asp:Label runat=”server” ID=”lblSalary” Text=’<%#Eval(“Salary”) %>’></asp:Label>
- </ItemTemplate>
- </asp:TemplateField>
- <asp:TemplateField HeaderText=”Update”>
- <HeaderStyle HorizontalAlign=”Left” />
- <ItemStyle HorizontalAlign=”Left” />
- <ItemTemplate>
- <asp:LinkButton runat=”server” ID=”btnEdit” Text=”Edit” CommandName=”Edit” ToolTip=”Click here to Edit the record” />
- </ItemTemplate>
- </asp:TemplateField>
- <asp:TemplateField HeaderText=”Delete”>
- <HeaderStyle HorizontalAlign=”Left” />
- <ItemStyle HorizontalAlign=”Left” />
- <ItemTemplate>
- <asp:LinkButton runat=”server” ID=”btnDelete” Text=”Delete” CommandName=”Delete” OnClientClick=”return confirm(‘Are You Sure You want to Delete the Record?’);” ToolTip=”Click here to Delete the record” />
- </span>
- </ItemTemplate>
- </asp:TemplateField>
- </Columns>
- </asp:GridView>
- </td>
- </tr>
- </table>
- </fieldset>
- </form>
- </body>
- <br />
- <br />
- <footer>
- <p style=”background-color: Yellow; font-weight: bold; color:blue; text-align: center; font-style: oblique”>© <script> document.write(new Date().toDateString()); </script></p>
- </footer>
- </html>
Code for GridViewDemo.aspx
I have added some CSS styles for buttons, textboxes, GridView, etc.
- <style>
- .button {
- background-color: #4CAF50;
- border: none;
- color: white;
- padding: 15px 32px;
- text-align: center;
- text-decoration: none;
- display: inline-block;
- font-size: 16px;
- margin: 4px 2px;
- cursor: pointer;
- }
- .DataGridFixedHeader {
- color: White;
- font-size: 13px;
- font-family: Verdana;
- background-color:yellow
- }
- .grid_item {
- background-color: #E3EAEB;
- border-width: 1px;
- font-family: Verdana;
- border-style: solid;
- font-size: 12pt;
- color: black;
- border: 1px solid black;
- }
- .grid_alternate {
- border-width: 1px;
- font-family: Verdana;
- border-style: solid;
- font-size: 12pt;
- color: black;
- background-color: White;
- }
- .button4 {
- border-radius: 9px;
- }
- input[type=text], select {
- width: 40%;
- padding: 12px 20px;
- margin: 10px 0;
- display: inline-block;
- border: 1px solid #ccc;
- border-radius: 4px;
- box-sizing: border-box;
- font-family: ‘Montserrat’, sans-serif;
- text-indent: 10px;
- color: blue;
- text-shadow: 0 1px 2px rgba(0, 0, 0, 0.3);
- font-size: 20px;
- }
- </style>
Then, I have added code for validation control part using CSS and JavaScript file, as described in Step4.
- <link href=”css/template.css” rel=”stylesheet” type=”text/css” />
- <link href=”css/validationEngine.jquery.css” rel=”stylesheet” type=”text/css” />
- <script src=”js/jquery-1.6.min.js” type=”text/javascript”></script>
- <script src=”js/jquery.validationEngine-en.js” type=”text/javascript” charset=”utf-8"></script>
- <script src=”js/jquery.validationEngine.js” type=”text/javascript” charset=”utf-8"></script>
- <script type=”text/javascript”>
- jQuery(document).ready(function () {
- jQuery(“#form1”).validationEngine();
- });
- </script>
Then, I added some textboxes and buttons in GridView in Table using td and tr tag.
I added textbox validation using JS and CSS. For example,
- <tr>
- <td style=”text-align:center”>
- <asp:TextBox runat=”server” placeholder=”Enter Phone Number..” ID=”txtPhoneNumber” ValidationGroup=”add” CssClass=”validate[required,custom[phone]” ></asp:TextBox>
- </td>
- <td></td>
- </tr>
Here “CssClass=”validate[required,custom[phone]”” will validate the phone number input as mentioned in “jquery.validationEngine-en.js” of CSS and JS Folder.
I have added some CSS Style to GridView for rows and datas.
- <asp:GridView ID=”grvEmployee” runat=”server” AllowPaging=”true” AutoGenerateColumns=”false” Width=”1100px”
- HeaderStyle-ForeColor=”blue” OnPageIndexChanging=”grvEmployee_PageIndexChanging” OnRowCancelingEdit=”grvEmployee_RowCancelingEdit” OnRowDeleting=”grvEmployee_RowDeleting” OnRowEditing=”grvEmployee_RowEditing”>
- <HeaderStyle CssClass=”DataGridFixedHeader” />
- <RowStyle CssClass=”grid_item” />
- <AlternatingRowStyle CssClass=”grid_alternate” />
- <FooterStyle CssClass=”DataGridFixedHeader” />
This part:
- <HeaderStyle CssClass=”DataGridFixedHeader” />
- <RowStyle CssClass=”grid_item” />
- <AlternatingRowStyle CssClass=”grid_alternate” />
- <FooterStyle CssClass=”DataGridFixedHeader” />
Then, I bind table columns in GridView.
- <asp:TemplateField HeaderText=”FirstName”>
- <HeaderStyle HorizontalAlign=”Left” />
- <ItemStyle HorizontalAlign=”Left” />
- <ItemTemplate>
- <asp:Label runat=”server” ID=”lblFirstName” Text=’<%#Eval(“FirstName”) %>’></asp:Label>
- </ItemTemplate>
- </asp:TemplateField>
Then, I have added Edit and Delete link button to update and remove datas.
- <asp:TemplateField HeaderText=”Update”>
- <HeaderStyle HorizontalAlign=”Left” />
- <ItemStyle HorizontalAlign=”Left” />
- <ItemTemplate>
- <asp:LinkButton runat=”server” ID=”btnEdit” Text=”Edit” CommandName=”Edit” ToolTip=”Click here to Edit the record” />
- </ItemTemplate>
- </asp:TemplateField>
- <asp:TemplateField HeaderText=”Delete”>
- <HeaderStyle HorizontalAlign=”Left” />
- <ItemStyle HorizontalAlign=”Left” />
- <ItemTemplate>
- <asp:LinkButton runat=”server” ID=”btnDelete” Text=”Delete” CommandName=”Delete” OnClientClick=”return confirm(‘Are You Sure You want to Delete the Record?’);” ToolTip=”Click here to Delete the record” />
- </span>
- </ItemTemplate>
- </asp:TemplateField>
I have added 3 important gridview events for update and delete purposes.
- OnPageIndexChanging=”grvEmployee_PageIndexChanging” OnRowCancelingEdit=”grvEmployee_RowCancelingEdit” OnRowDeleting=”grvEmployee_RowDeleting” OnRowEditing=”grvEmployee_RowEditing”
I have added code for empty gridview if there is no data.
- CellPadding=”2" EnableModelValidation=”True” ForeColor=”red” GridLines=”Both” ItemStyle-HorizontalAlign=”center” EmptyDataText=”There Is No Records In Database!”
Step6
Code Ref. Of GridViewDemo.aspx.cs
- using System;
- using System.Collections.Generic;
- using System.Configuration;
- using System.Data;
- using System.Data.SqlClient;
- using System.Linq;
- using System.Web;
- using System.Web.UI;
- using System.Web.UI.WebControls;
- namespace GridViewDemo
- {
- public partial class GridViewDemo : System.Web.UI.Page
- {
- private string strConnectionString = ConfigurationManager.ConnectionStrings[“myconnection”].ConnectionString;
- private SqlCommand _sqlCommand;
- private SqlDataAdapter _sqlDataAdapter;
- DataSet _dtSet;
- protected void Page_Load(object sender, EventArgs e)
- {
- if (!IsPostBack)
- {
- BindEmployeeData();
- }
- btnUpdate.Visible = false;
- btnAddEmployee.Visible = true;
- }
- private static void ShowAlertMessage(string error)
- {
- System.Web.UI.Page page = System.Web.HttpContext.Current.Handler as System.Web.UI.Page;
- if (page != null)
- {
- error = error.Replace(“‘“, “\’”);
- System.Web.UI.ScriptManager.RegisterStartupScript(page, page.GetType(), “err_msg”, “alert(‘“ + error + “‘);”, true);
- }
- }
- public void CreateConnection()
- {
- SqlConnection _sqlConnection = new SqlConnection(strConnectionString);
- _sqlCommand = new SqlCommand();
- _sqlCommand.Connection = _sqlConnection;
- }
- public void OpenConnection()
- {
- _sqlCommand.Connection.Open();
- }
- public void CloseConnection()
- {
- _sqlCommand.Connection.Close();
- }
- public void DisposeConnection()
- {
- _sqlCommand.Connection.Dispose();
- }
- public void BindEmployeeData()
- {
- try
- {
- CreateConnection();
- OpenConnection();
- _sqlCommand.CommandText = “Sp_GridCrud”;
- _sqlCommand.CommandType = CommandType.StoredProcedure;
- _sqlCommand.Parameters.AddWithValue(“@Event”, “Select”);
- _sqlDataAdapter = new SqlDataAdapter(_sqlCommand);
- _dtSet = new DataSet();
- _sqlDataAdapter.Fill(_dtSet);
- grvEmployee.DataSource = _dtSet;
- grvEmployee.DataBind();
- }
- catch (Exception ex)
- {
- Response.Redirect(“The Error is “ + ex);
- }
- finally
- {
- CloseConnection();
- DisposeConnection();
- }
- }
- protected void btnAddEmployee_Click(object sender, EventArgs e)
- {
- try
- {
- CreateConnection();
- OpenConnection();
- _sqlCommand.CommandText = “Sp_GridCrud”;
- _sqlCommand.CommandType = CommandType.StoredProcedure;
- _sqlCommand.Parameters.AddWithValue(“@Event”, “Add”);
- _sqlCommand.Parameters.AddWithValue(“@FirstName”, Convert.ToString(txtFirstName.Text.Trim()));
- _sqlCommand.Parameters.AddWithValue(“@LastName”, Convert.ToString(txtLastName.Text.Trim()));
- _sqlCommand.Parameters.AddWithValue(“@PhoneNumber”, Convert.ToString(txtPhoneNumber.Text.Trim()));
- _sqlCommand.Parameters.AddWithValue(“@EmailAddress”, Convert.ToString(txtEmailAddress.Text.Trim()));
- _sqlCommand.Parameters.AddWithValue(“@Salary”, Convert.ToDecimal(txtSalary.Text));
- int result = Convert.ToInt32(_sqlCommand.ExecuteNonQuery());
- if (result > 0)
- {
- ShowAlertMessage(“Record Is Inserted Successfully”);
- BindEmployeeData();
- ClearControls();
- }
- else
- {
- ShowAlertMessage(“Failed”);
- }
- }
- catch (Exception ex)
- {
- ShowAlertMessage(“Check your input data”);
- }
- finally
- {
- CloseConnection();
- DisposeConnection();
- }
- }
- public void ClearControls()
- {
- txtFirstName.Text = “”;
- txtLastName.Text = “”;
- txtPhoneNumber.Text = “”;
- txtEmailAddress.Text = “”;
- txtSalary.Text = “”;
- }
- protected void grvEmployee_RowEditing(object sender, GridViewEditEventArgs e)
- {
- btnAddEmployee.Visible = false;
- btnUpdate.Visible = true;
- int RowIndex = e.NewEditIndex;
- Label empid = (Label)grvEmployee.Rows[RowIndex].FindControl(“lblEmpId”);
- Session[“id”] = empid.Text;
- txtFirstName.Text = ((Label)grvEmployee.Rows[RowIndex].FindControl(“lblFirstName”)).Text.ToString();
- txtLastName.Text = ((Label)grvEmployee.Rows[RowIndex].FindControl(“lblLastName”)).Text.ToString();
- txtPhoneNumber.Text = ((Label)grvEmployee.Rows[RowIndex].FindControl(“lblPhoneNumber”)).Text.ToString();
- txtEmailAddress.Text = ((Label)grvEmployee.Rows[RowIndex].FindControl(“lblEmailAddress”)).Text.ToString();
- txtSalary.Text = ((Label)grvEmployee.Rows[RowIndex].FindControl(“lblSalary”)).Text.ToString();
- }
- protected void grvEmployee_RowDeleting(object sender, GridViewDeleteEventArgs e)
- {
- try
- {
- CreateConnection();
- OpenConnection();
- Label id = (Label)grvEmployee.Rows[e.RowIndex].FindControl(“lblEmpId”);
- _sqlCommand.CommandText = “Sp_GridCrud”;
- _sqlCommand.Parameters.AddWithValue(“@Event”, “Delete”);
- _sqlCommand.Parameters.AddWithValue(“@EmpId”, Convert.ToInt32(id.Text));
- _sqlCommand.CommandType = CommandType.StoredProcedure;
- int result = Convert.ToInt32(_sqlCommand.ExecuteNonQuery());
- if (result > 0)
- {
- ShowAlertMessage(“Record Is Deleted Successfully”);
- grvEmployee.EditIndex = -1;
- BindEmployeeData();
- }
- else
- {
- lblMessage.Text = “Failed”;
- lblMessage.ForeColor = System.Drawing.Color.Red;
- BindEmployeeData();
- }
- }
- catch (Exception ex)
- {
- ShowAlertMessage(“Check your input data”);
- }
- finally
- {
- CloseConnection();
- DisposeConnection();
- }
- }
- protected void grvEmployee_RowCancelingEdit(object sender, GridViewCancelEditEventArgs e)
- {
- grvEmployee.EditIndex = -1;
- BindEmployeeData();
- }
- protected void grvEmployee_PageIndexChanging(object sender, GridViewPageEventArgs e)
- {
- grvEmployee.PageIndex = e.NewPageIndex;
- BindEmployeeData();
- }
- protected void btnReset_Click(object sender, EventArgs e)
- {
- ClearControls();
- }
- protected void btnUpdate_Click(object sender, EventArgs e)
- {
- try
- {
- CreateConnection();
- OpenConnection();
- _sqlCommand.CommandText = “Sp_GridCrud”;
- _sqlCommand.CommandType = CommandType.StoredProcedure;
- _sqlCommand.Parameters.AddWithValue(“@Event”, “Update”);
- _sqlCommand.Parameters.AddWithValue(“@FirstName”, Convert.ToString(txtFirstName.Text.Trim()));
- _sqlCommand.Parameters.AddWithValue(“@LastName”, Convert.ToString(txtLastName.Text.Trim()));
- _sqlCommand.Parameters.AddWithValue(“@PhoneNumber”, Convert.ToString(txtPhoneNumber.Text.Trim()));
- _sqlCommand.Parameters.AddWithValue(“@EmailAddress”, Convert.ToString(txtEmailAddress.Text.Trim()));
- _sqlCommand.Parameters.AddWithValue(“@Salary”, Convert.ToDecimal(txtSalary.Text));
- _sqlCommand.Parameters.AddWithValue(“@EmpId”, Convert.ToDecimal(Session[“id”]));
- int result = Convert.ToInt32(_sqlCommand.ExecuteNonQuery());
- if (result > 0)
- {
- ShowAlertMessage(“Record Is Updated Successfully”);
- grvEmployee.EditIndex = -1;
- BindEmployeeData();
- ClearControls();
- }
- else
- {
- ShowAlertMessage(“Failed”);
- }
- }
- catch (Exception ex)
- {
- ShowAlertMessage(“Check your input data”);
- }
- finally
- {
- CloseConnection();
- DisposeConnection();
- }
- }
- }
- }
Code Description Of GridViewDemo.aspx.cs: Here I added Ado.Net related namespaces to access ado.net objects to perform crud operation using backend.
- using System.Data;
- using System.Data.SqlClient;
Here I added connection string add name.
- private string strConnectionString = ConfigurationManager.ConnectionStrings[“myconnection”].ConnectionString;
Added ado.net related objects.
- private SqlCommand _sqlCommand;
- private SqlDataAdapter _sqlDataAdapter;
- DataSet _dtSet;
Then in the page load event I used one function definition named “BindEmployeeData();” and Enable Add button and Disable Update button.
- protected void Page_Load(object sender, EventArgs e)
- {
- if (!IsPostBack)
- {
- BindEmployeeData();
- }
- btnUpdate.Visible = false;
- btnAddEmployee.Visible = true;
- }
Then I build this function to bind data with gridview.
- public void BindEmployeeData()
- {
- try
- {
- CreateConnection();
- OpenConnection();
- _sqlCommand.CommandText = “Sp_GridCrud”;
- _sqlCommand.CommandType = CommandType.StoredProcedure;
- _sqlCommand.Parameters.AddWithValue(“@Event”, “Select”);
- _sqlDataAdapter = new SqlDataAdapter(_sqlCommand);
- _dtSet = new DataSet();
- _sqlDataAdapter.Fill(_dtSet);
- grvEmployee.DataSource = _dtSet;
- grvEmployee.DataBind();
- }
- catch (Exception ex)
- {
- Response.Redirect(“The Error is “ + ex);
- }
- finally
- {
- CloseConnection();
- DisposeConnection();
- }
- }
Then I created a show alert message script to give users messages in javascript format.
- private static void ShowAlertMessage(string error)
- {
- System.Web.UI.Page page = System.Web.HttpContext.Current.Handler as System.Web.UI.Page;
- if (page != null)
- {
- error = error.Replace(“‘“, “\’”);
- System.Web.UI.ScriptManager.RegisterStartupScript(page, page.GetType(), “err_msg”, “alert(‘“ + error + “‘);”, true);
- }
- }
Ado.net objects Create, open, close, and dispose of connection property for connecting database.
- public void CreateConnection()
- {
- SqlConnection _sqlConnection = new SqlConnection(strConnectionString);
- _sqlCommand = new SqlCommand();
- _sqlCommand.Connection = _sqlConnection;
- }
- public void OpenConnection()
- {
- _sqlCommand.Connection.Open();
- }
- public void CloseConnection()
- {
- _sqlCommand.Connection.Close();
- }
- public void DisposeConnection()
- {
- _sqlCommand.Connection.Dispose();
- }
An application can call Close more than one time. No exception is generated. If you called Dispose method SqlConnection object state will be reset. If you try to call any method on disposed of SqlConnection object, you will receive an exception. If you use a connection object one time, use Dispose. If the connection object must be reused, use the Close method. Inside add button click event added code for insert data operation.
- protected void btnAddEmployee_Click(object sender, EventArgs e)
- {
- try
- {
- CreateConnection();
- OpenConnection();
- _sqlCommand.CommandText = “Sp_GridCrud”;
- _sqlCommand.CommandType = CommandType.StoredProcedure;
- _sqlCommand.Parameters.AddWithValue(“@Event”, “Add”);
- _sqlCommand.Parameters.AddWithValue(“@FirstName”, Convert.ToString(txtFirstName.Text.Trim()));
- _sqlCommand.Parameters.AddWithValue(“@LastName”, Convert.ToString(txtLastName.Text.Trim()));
- _sqlCommand.Parameters.AddWithValue(“@PhoneNumber”, Convert.ToString(txtPhoneNumber.Text.Trim()));
- _sqlCommand.Parameters.AddWithValue(“@EmailAddress”, Convert.ToString(txtEmailAddress.Text.Trim()));
- _sqlCommand.Parameters.AddWithValue(“@Salary”, Convert.ToDecimal(txtSalary.Text));
- int result = Convert.ToInt32(_sqlCommand.ExecuteNonQuery());
- if (result > 0)
- {
- ShowAlertMessage(“Record Is Inserted Successfully”);
- BindEmployeeData();
- ClearControls();
- }
- else
- {
- ShowAlertMessage(“Failed”);
- }
- }
- catch (Exception ex)
- {
- ShowAlertMessage(“Check your input data”);
- }
- finally
- {
- CloseConnection();
- DisposeConnection();
- }
- }
For reset controls created one function.
- public void ClearControls()
- {
- txtFirstName.Text = “”;
- txtLastName.Text = “”;
- txtPhoneNumber.Text = “”;
- txtEmailAddress.Text = “”;
- txtSalary.Text = “”;
- }
Then I added code for after clicking edit link all data values will go to respected to controls.
- protected void grvEmployee_RowEditing(object sender, GridViewEditEventArgs e)
- {
- btnAddEmployee.Visible = false;
- btnUpdate.Visible = true;
- int RowIndex = e.NewEditIndex;
- Label empid = (Label)grvEmployee.Rows[RowIndex].FindControl(“lblEmpId”);
- Session[“id”] = empid.Text;
- txtFirstName.Text = ((Label)grvEmployee.Rows[RowIndex].FindControl(“lblFirstName”)).Text.ToString();
- txtLastName.Text = ((Label)grvEmployee.Rows[RowIndex].FindControl(“lblLastName”)).Text.ToString();
- txtPhoneNumber.Text = ((Label)grvEmployee.Rows[RowIndex].FindControl(“lblPhoneNumber”)).Text.ToString();
- txtEmailAddress.Text = ((Label)grvEmployee.Rows[RowIndex].FindControl(“lblEmailAddress”)).Text.ToString();
- txtSalary.Text = ((Label)grvEmployee.Rows[RowIndex].FindControl(“lblSalary”)).Text.ToString();
- }
For deleting the link the respective code is mentioned below.
- protected void grvEmployee_RowDeleting(object sender, GridViewDeleteEventArgs e)
- {
- try
- {
- CreateConnection();
- OpenConnection();
- Label id = (Label)grvEmployee.Rows[e.RowIndex].FindControl(“lblEmpId”);
- _sqlCommand.CommandText = “Sp_GridCrud”;
- _sqlCommand.Parameters.AddWithValue(“@Event”, “Delete”);
- _sqlCommand.Parameters.AddWithValue(“@EmpId”, Convert.ToInt32(id.Text));
- _sqlCommand.CommandType = CommandType.StoredProcedure;
- int result = Convert.ToInt32(_sqlCommand.ExecuteNonQuery());
- if (result > 0)
- {
- ShowAlertMessage(“Record Is Deleted Successfully”);
- grvEmployee.EditIndex = -1;
- BindEmployeeData();
- }
- else
- {
- lblMessage.Text = “Failed”;
- lblMessage.ForeColor = System.Drawing.Color.Red;
- BindEmployeeData();
- }
- }
- catch (Exception ex)
- {
- ShowAlertMessage(“Check your input data”);
- }
- finally
- {
- CloseConnection();
- DisposeConnection();
- }
- }
- protected void grvEmployee_RowCancelingEdit(object sender, GridViewCancelEditEventArgs e)
- {
- grvEmployee.EditIndex = -1;
- BindEmployeeData();
- }
- protected void grvEmployee_PageIndexChanging(object sender, GridViewPageEventArgs e)
- {
- grvEmployee.PageIndex = e.NewPageIndex;
- BindEmployeeData();
- }
Then in Reset button control, I added the function name.
- protected void btnReset_Click(object sender, EventArgs e)
- {
- ClearControls();
- }
Inside update button click event I added code to update the existing data.
- protected void btnUpdate_Click(object sender, EventArgs e)
- {
- try
- {
- CreateConnection();
- OpenConnection();
- _sqlCommand.CommandText = “Sp_GridCrud”;
- _sqlCommand.CommandType = CommandType.StoredProcedure;
- _sqlCommand.Parameters.AddWithValue(“@Event”, “Update”);
- _sqlCommand.Parameters.AddWithValue(“@FirstName”, Convert.ToString(txtFirstName.Text.Trim()));
- _sqlCommand.Parameters.AddWithValue(“@LastName”, Convert.ToString(txtLastName.Text.Trim()));
- _sqlCommand.Parameters.AddWithValue(“@PhoneNumber”, Convert.ToString(txtPhoneNumber.Text.Trim()));
- _sqlCommand.Parameters.AddWithValue(“@EmailAddress”, Convert.ToString(txtEmailAddress.Text.Trim()));
- _sqlCommand.Parameters.AddWithValue(“@Salary”, Convert.ToDecimal(txtSalary.Text));
- _sqlCommand.Parameters.AddWithValue(“@EmpId”, Convert.ToDecimal(Session[“id”]));
- int result = Convert.ToInt32(_sqlCommand.ExecuteNonQuery());
- if (result > 0)
- {
- ShowAlertMessage(“Record Is Updated Successfully”);
- grvEmployee.EditIndex = -1;
- BindEmployeeData();
- ClearControls();
- }
- else
- {
- ShowAlertMessage(“Failed”);
- }
- }
- catch (Exception ex)
- {
- ShowAlertMessage(“Check your input data”);
- }
- finally
- {
- CloseConnection();
- DisposeConnection();
- }
- }
In every link button event and button click event, I added the show alert function, as mentioned below.
- ShowAlertMessage(“Check your input data”);

Step7
I have added connection string in Web.Config file.
Code Ref
- <connectionStrings>
- <add name=”myconnection” connectionString=”Put Your Connection String Here.” providerName=”System.Data.SqlClient”/>
- </connectionStrings>
Code Description
Here is the additional name “add name=”myconnection”” , I added in my code-behind file.
OUTPUT
Url Is — http://localhost:24319/GridViewDemo.aspx
Check for grid view if no data is there.
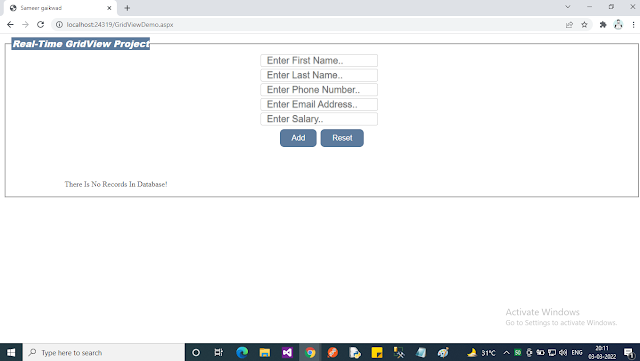
Without any input click Add button.

Then put some dummy data then Click the reset button to clear all images.
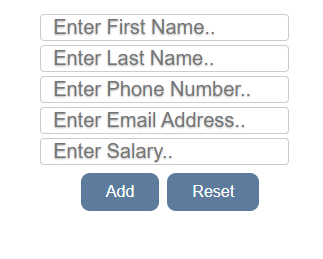
Then Check for valid phone no. and email address.
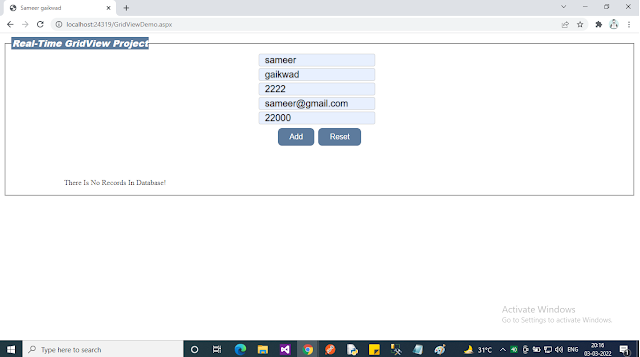
Then enter all valid data and click add.
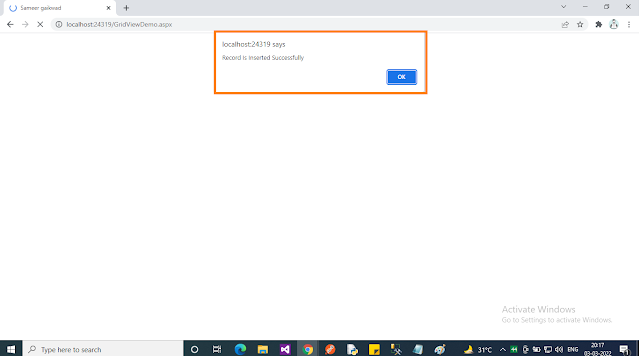
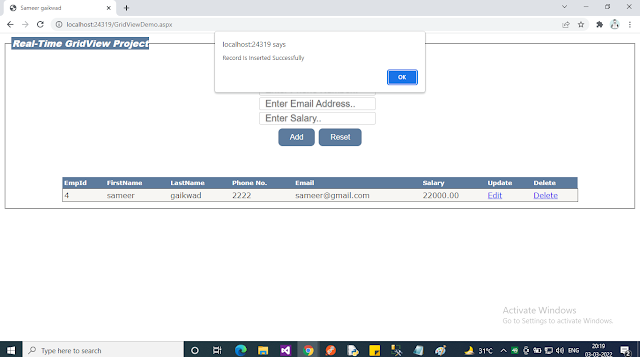
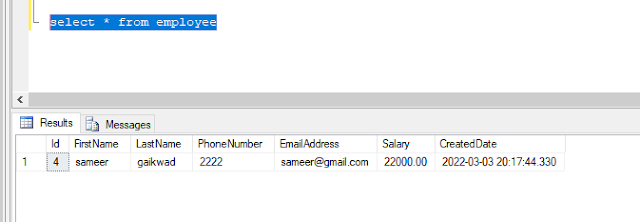
Then check for the backend after inserting.
Then click on the edit link in grid view and update data.
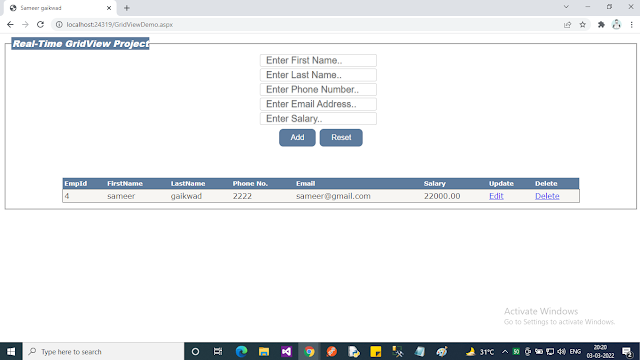
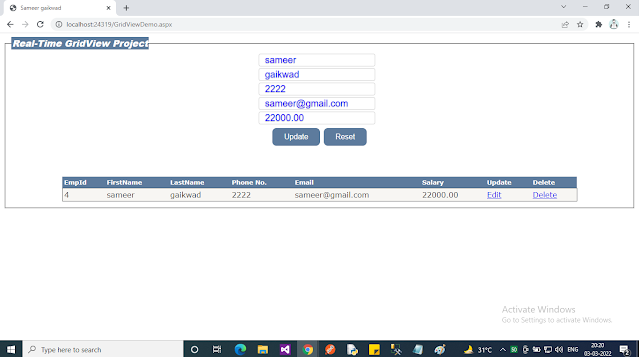
Then check for the backend after updating the email address and created date will show the date-time in which the user inserted and updated and deleted.
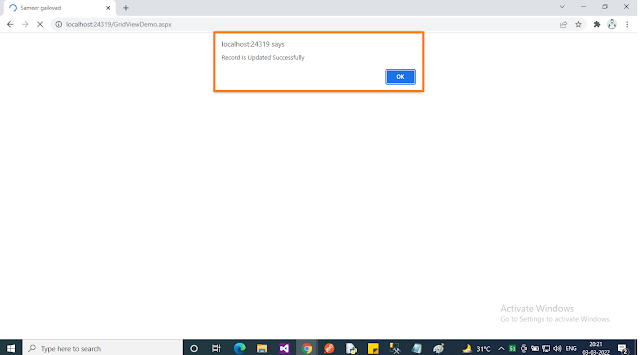
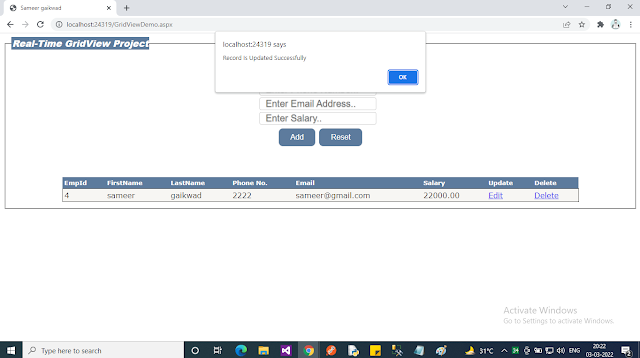
Then click on the delete link.
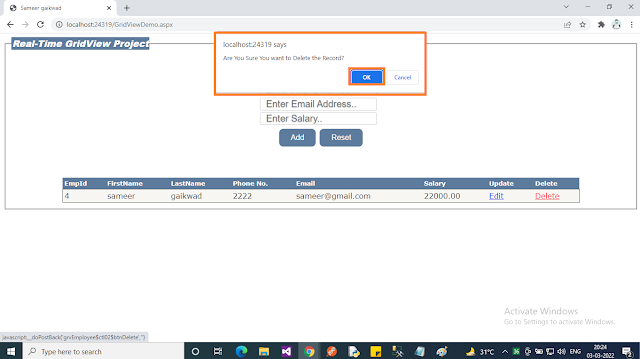
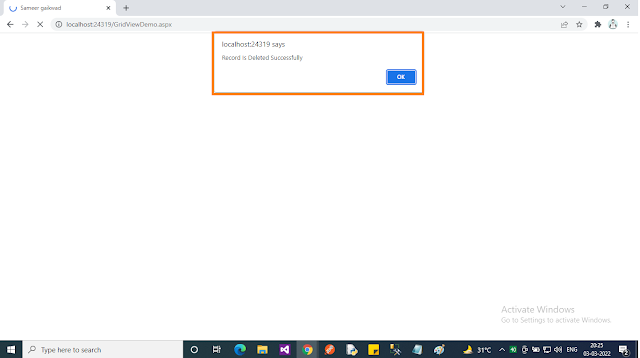
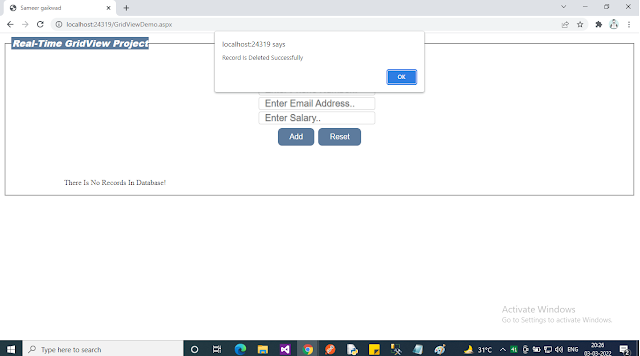
Then check for backend after delete.
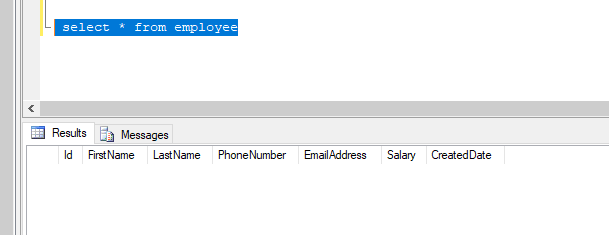


0 Comments