How To Create A Web Service Project In .NET Using Visual Studio
Introduction
In this demo, today, we will try to create a web service project. We will also learn how to consume the web service in our project. Basically, at the end of this project, you should be able to use the web methods created in the web service in your code. So, if you are able to achieve this, you are good with this concept. Let’s go through each step one by one and see how it happens.
What is a Web service?
I hope you know the meaning of web service before you execute the demo. A web service is nothing but a software application that runs on the web having some exposed web methods which other applications can use over HTTP/ HTTPS protocols using technologies such as XML, SOAP, WSDL, and UDDI. Here in this demo, we will create one such web service and we will try to use its web methods. We will do all of this in a single web project but you can try it in different projects on the same machines as well as different projects on different machines. It should work.
Step 1
Click on File >> New >> Project as given below.
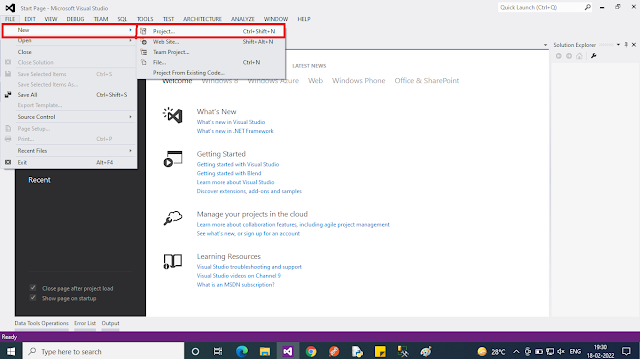
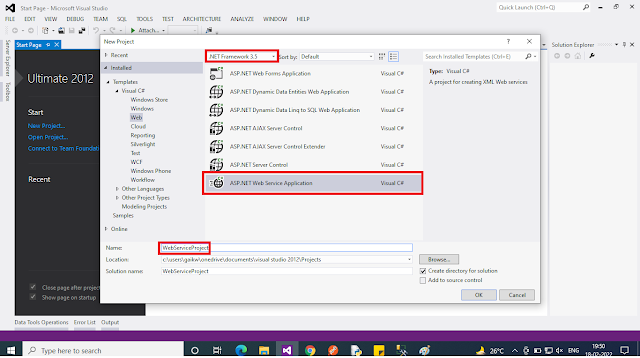
Once you click on Project, you will see the following pop-up window.
Step 2
Here, choose ASP.NET Web Application (.NET Framework) and give it a name as I have given — WebServiceProject. Click on OK.
Select the Empty template.
It creates a solution having the following solution structure.
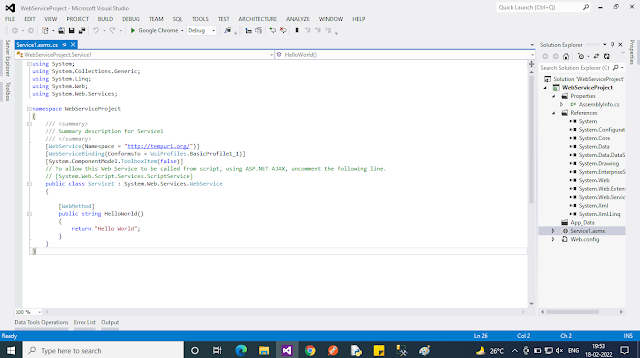
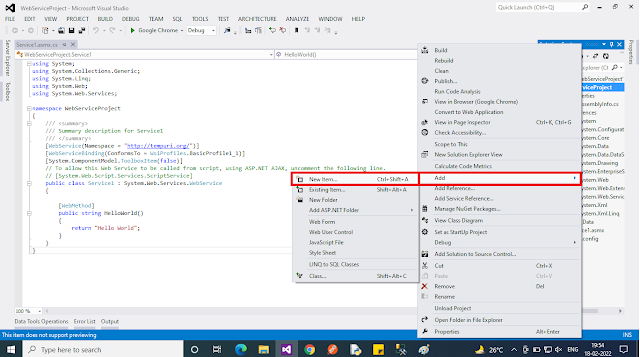
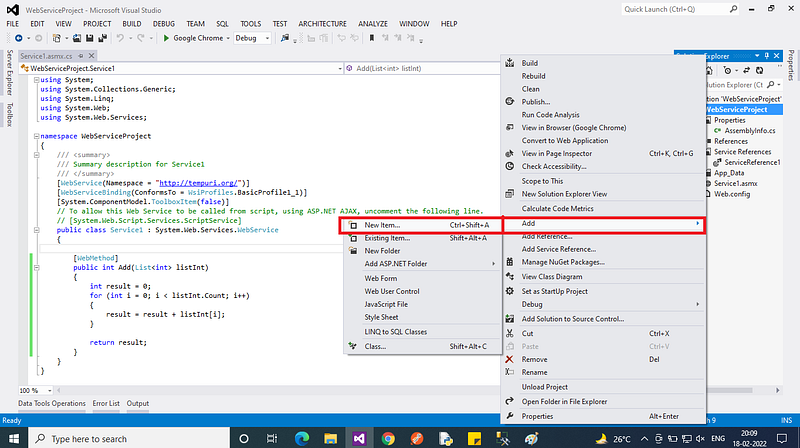
Right-click the project.
Step 3
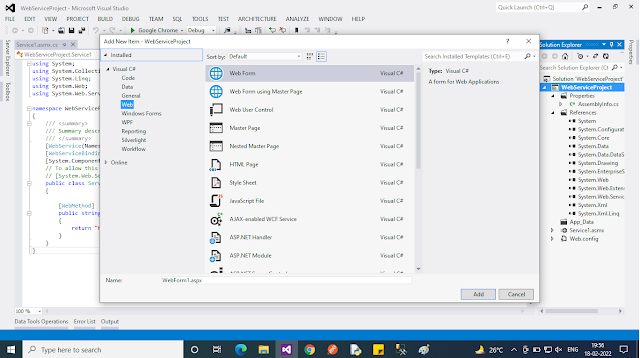
Once you click on the New Item, choose Web Service and give it a name as given below.
Step 4
Now, write the following code in WebService.asmx file.
- using System;
- using System.Collections.Generic;
- using System.Linq;
- using System.Web;
- using System.Web.Services;
- namespace WebServiceProject
- {
- /// <summary>
- /// Summary description for WebService
- /// </summary>
- [WebService(Namespace = “http://tempuri.org/")]
- [WebServiceBinding(ConformsTo = WsiProfiles.BasicProfile1_1)]
- [System.ComponentModel.ToolboxItem(false)]
- // To allow this Web Service to be called from script, using ASP.NET AJAX, uncomment the following line.
- // [System.Web.Script.Services.ScriptService]
- public class WebService : System.Web.Services.WebService
- {
- [WebMethod]
- public string HelloWorld()
- {
- return “Hello World”;
- }
- [WebMethod]
- public int Add(List<int> listInt)
- {
- int result = 0;
- for(int i =0; i< listInt.Count; i++)
- {
- result = result + listInt[i];
- }
- return result;
- }
- }
- }
Here, WebMethod HelloWorld comes by default when you create a web service. You can change its implementation if you want. We have implemented another method that can take a list of integers as input and will give you some of all the lists of integers given as input.
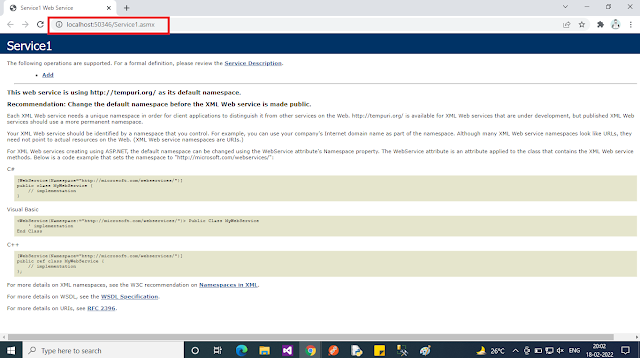
Now, if you run this project and point the URL to WebService.ASMX, then you will get the following result, which indicates that your web service has been created.
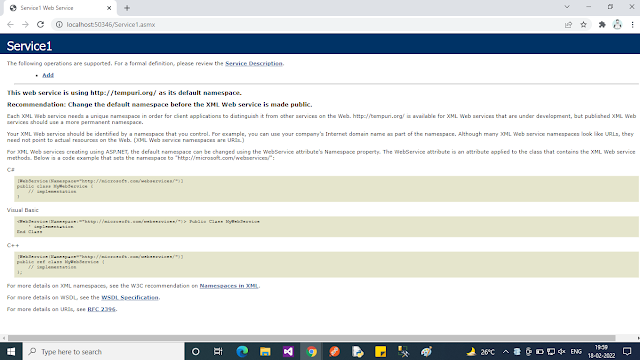
Now you can find all the descriptions of services written on this page having the list of methods which are available via this web service. You can also see the service description to get a better picture. If you will click methods, then you will see its soap request-response structures and for simple generic methods, you will also see an option to invoke methods.
How to consume this Web service — there are multiple ways for doing that. We will here try to use it via a web reference method. We will add a Web reference of this service in our project for consumption.
How to add a web service reference to Project?
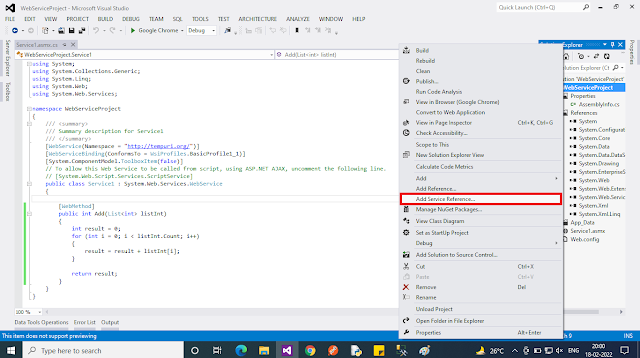
For adding Web reference of this service in the project, right-click on the project and click “Add Service Reference”. Once you do that you will see the following popup window.
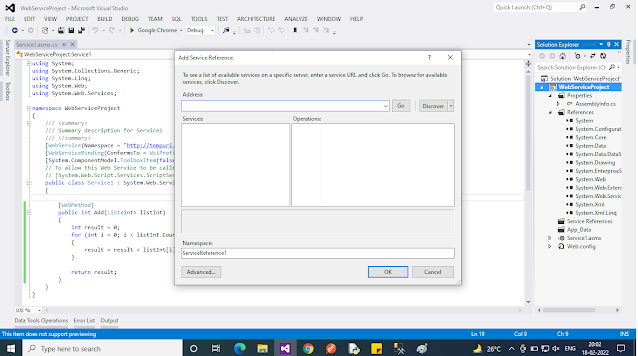
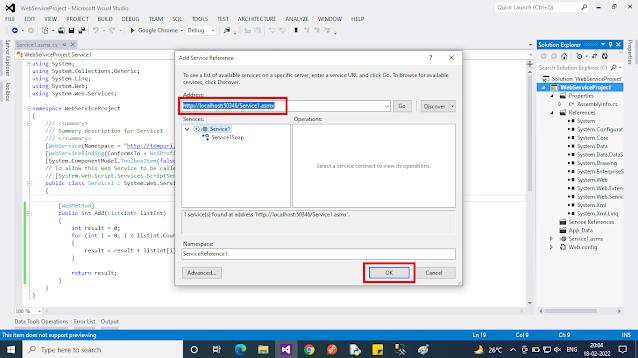
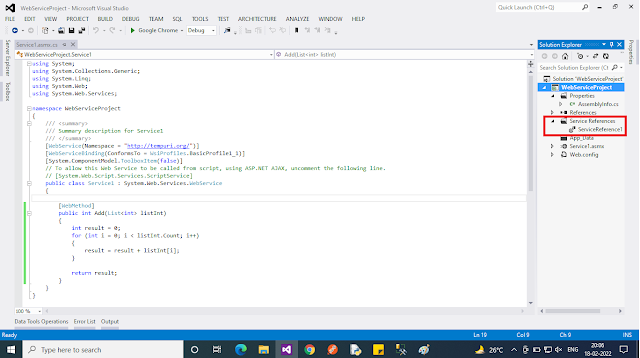
So here we have entered the path to the web service and once you click on Go you will see the service structure like this. You can also see methods exposed by clicking on WebService over here. Just give it a namespace name that you want to use. For us, we are using ServiceReference1. Click OK and it will add a service reference of this web service in your project. mesameergaikwad
Now how to use this web service?
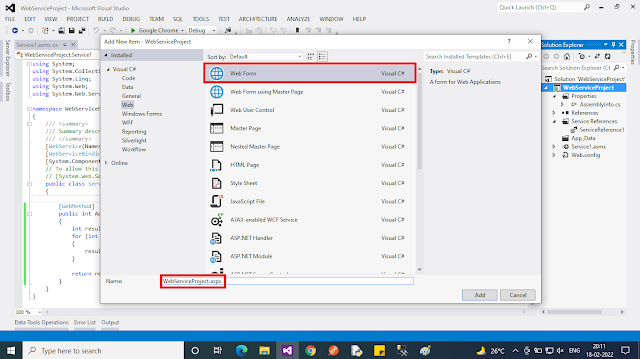
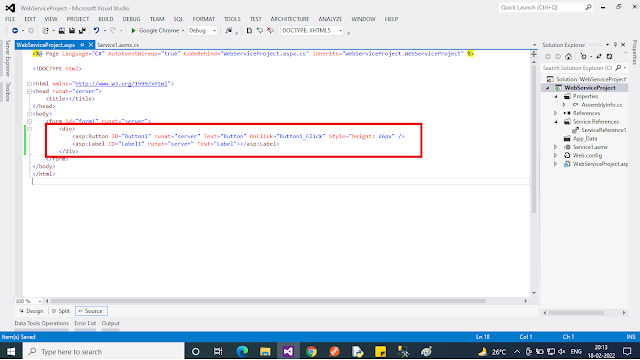
For this, I will add a webform page to our project. Here I have added WebForm.aspx having a button and a label. What I want to do here is on click of a button in this web form I should get the sum of an integer list using our web service method. So code looks like below in WebForm.aspx.
- <%@ Page Language=”C#” AutoEventWireup=”true” CodeBehind=”WebForm.aspx.cs” Inherits=”WebServiceProject.WebForm” %>
- <!DOCTYPE html>
- <html xmlns=”http://www.w3.org/1999/xhtml">
- <head runat=”server”>
- <title></title>
- </head>
- <body>
- <form id=”form1" runat=”server”>
- <div>
- <asp:Button ID=”Button1" runat=”server” Text=”Button” OnClick=”Button1_Click” style=”height: 26px” /><asp:Label ID=”Label1" runat=”server” Text=”Label”></asp:Label>
- </div>
- </form>
- </body>
- </html>
In WebForm.aspx.cs, I have written a handler like this.
- using System;
- using System.Collections.Generic;
- using System.Linq;
- using System.Web;
- using System.Web.UI;
- using System.Web.UI.WebControls;
- using WebServiceProject.ServiceReference1;
- namespace WebServiceProject
- {
- public partial class WebForm : System.Web.UI.Page
- {
- protected void Page_Load(object sender, EventArgs e)
- {
- }
- protected void Button1_Click(object sender, EventArgs e)
- {
- WebService webService = new WebService();
- List<int> lstIntegers = new List<int> { 5, 6, 7 };
- Label1.Text = “Output of WebService: “ +webService.Add(lstIntegers).ToString();
- }
- }
- }
So now, if you run this project and point to this webform, you will get the sum of all these hardcoded 3 integers lists using the Add method. The output of this comes as below after clicking the button on the page.

The task is for this concept.
Conclusion
We have understood using the steps above how to create a web service and how to use a web service using the addition of web service in the C# web project in visual studio. There are other ways also available to consume this via SOAP and other web mechanisms. Do run all these steps and you should not be getting any issues in setting all of the above things on your machine.


0 Comments