Asp.net Bind GridView Using DataTable Linq to SQL
In this article, I will cover the basics of creating DataTable to get data and fill it into the ASP GridView Control to fill, bind, and show the data.
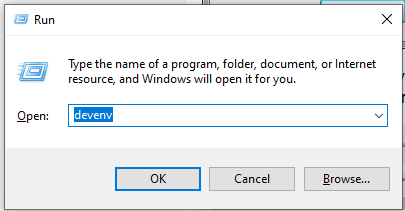
Step 1: Firstly, we need to create an empty project by opening Visual Studio by pressing the command devenv in the Start menu search bar or using Windows Run-Command by pressing (Windows icon + R ) and entering devenv. It will open the installed version of Visual Studio.
If pressing this opens the old one, you can change it by changing the registry value for the updated version by following this link.
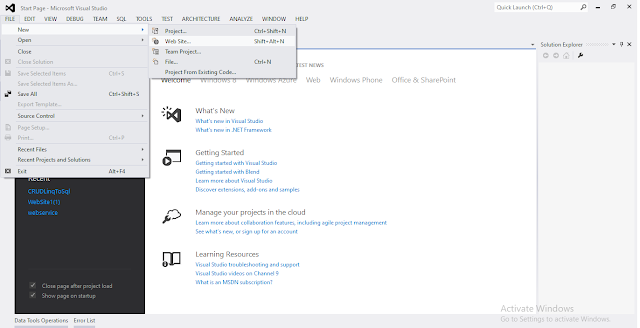
Step 2: Now after opening Visual Studio you can create new a website by going to File, New, then Website, or by pressing the Shift+Alt+N command in Visual Studio.
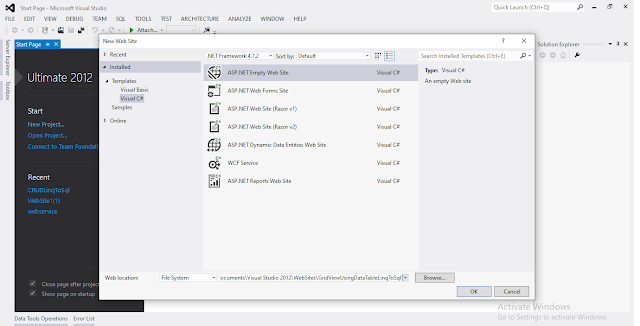
Step 3: Now give a name to the project and also select the desired location of the website.
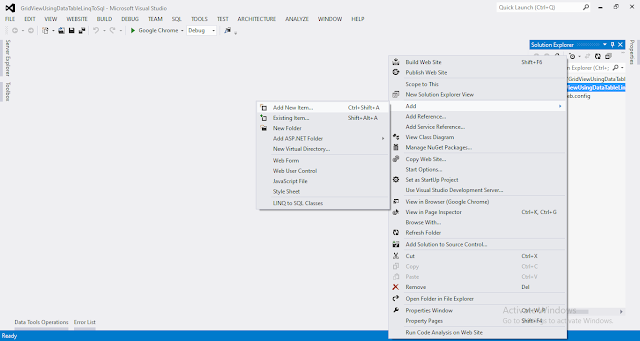
Step 4: Now create a new web form by pressing the combination of keys (Ctrl + Shift + A).
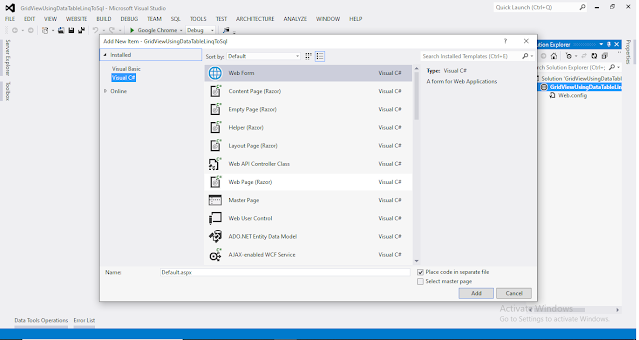
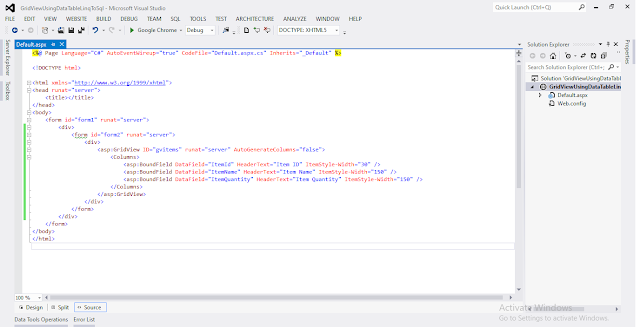
Step 5: Now we first add GridView control to the Web Form.
- <form id=”form1" runat=”server”>
- <div>
- <asp:GridView ID=”gvitems” runat=”server” AutoGenerateColumns=”false”>
- <Columns>
- <asp:BoundField DataField=”ItemId” HeaderText=”Item ID” ItemStyle-Width=”30" />
- <asp:BoundField DataField=”ItemName” HeaderText=”Item Name” ItemStyle-Width=”150" />
- <asp:BoundField DataField=”ItemQuantity” HeaderText=”Item Quantity” ItemStyle-Width=”150" />
- </Columns>
- </asp:GridView>
- </div>
- </form>
Note: (Possible Exceptions)
- Make sure that GridView control must be placed in <form> tag with runat=’server’ attribute.
- Another thing which you need to take care of is that you must use AutoGenerateColumns=”false”.
If you are using custom columns that are binding date then you must set this attribute to false otherwise see the image for reference.
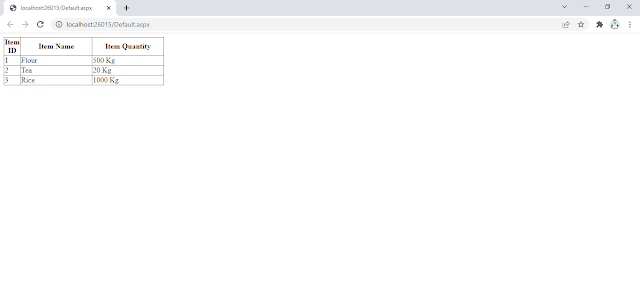
As you can see the columns are repeated by default, it is set to true when you set it to false and it comes to its original position of a number of assigned columns.
Step 6: Import the required Namespace.
- using System.Data;
Step 7: Now we can write the ADO.NET server-side code to generate columns, add new values to row and finally bind it to the GridView.
- if (!Page.IsPostBack)
- {
- DataTable dt = new DataTable();
- dt.Columns.AddRange(new DataColumn[3] { new DataColumn(“ItemId”, typeof(int)),
- new DataColumn(“ItemName”, typeof(string)),
- new DataColumn(“ItemQuantity”,typeof(string)) });
- dt.Rows.Add(1, “Flour”, “500 Kg”);
- dt.Rows.Add(2, “Tea”, “20 Kg”);
- dt.Rows.Add(3, “Rice”, “1000 Kg”);
- gvitems.DataSource = dt;
- gvitems.DataBind();
- }
Let’s elaborate code one by one.
- DataTable dt = new DataTable();
Initialize the new instance of DataTable class by new Keyword.
- dt.Columns.AddRange(new DataColumn[3] { new DataColumn(“ItemId”, typeof(int)),
- new DataColumn(“ItemName”, typeof(string)),
- new DataColumn(“ItemQuantity”,typeof(string)) });
Add columns to the array to the end of collection.
- dt.Rows.Add(1, “Flour”, “500 Kg”);
- dt.Rows.Add(2, “Tea”, “20 Kg”);
- dt.Rows.Add(3, “Rice”, “1000 Kg”);
Create a new row with specified values and add it to the data row collection.
- gvitems.DataSource = dt;
Gets or sets the object from which the data-bound control retrieves its list.
- gvitems.DataBind();
Bind the DataSource to the GridView control.
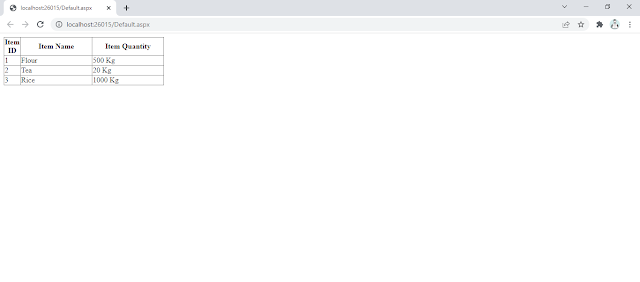
Step 8: Final Output
#mesameergaikwad


0 Comments